Streamlining Your Flutter Deployment Process with Firebase App Distribution Using Fastlane: Part 1

By James Preston | Senior Software Engineer & Engineering Manager
For mobile developers working with Flutter, deploying apps to multiple platforms can quickly become a repetitive and time-consuming task. By leveraging tools like Fastlane and Firebase App Distribution, you can automate these processes, allowing you to focus on writing high-quality code and other important aspects of development.
In this guide, we’ll cover how to set up Fastlane with Flutter to streamline deployment, manage app signing, and integrate with CI/CD pipelines. Specifically, we’ll focus on adding Fastlane to the iOS portion of your Flutter project and automating its deployment to Firebase App Distribution using GitHub Actions.
Step 1: Installing Fastlane with Homebrew
To get started with Fastlane, install it via Homebrew by running:
brew install fastlane
Once installed, verify that Fastlane is set up correctly with:
fastlane --version
Now you’re ready to configure Fastlane for your Flutter project!
Step 2: Configuring Fastlane for Flutter (iOS)
Initialize Fastlane for iOS
Navigate to your Flutter project’s ios directory:
cd ios
fastlane init
Fastlane will guide you through the setup process by searching for iOS and Android projects in the directory and creating the necessary configuration files, including the Fastfile and Appfile.
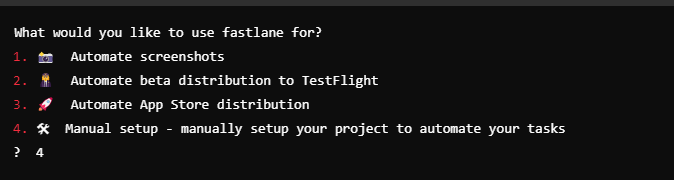
Select Manual Automation
When prompted to choose what you would like to use fastlane for, select Manual Setup for this example. Once the setup is complete, Fastlane will provide a list of available actions, along with links to further documentation, such as generating screenshots, beta distribution, App Store deployment, and code signing.
Example Fastfile for iOS
Here’s a basic example of a Fastfile for building and distributing your iOS app:
default_platform(:ios)
platform :ios do
  # Define a lane to build the iOS app
  desc "Build the iOS app"
  lane :build do
    build_ios_app(
      scheme: "Runner", # By default, Flutter projects' scheme is called Runner
      export_options: {
        provisioningProfiles: {
          "com.dxsolo.fastlaneHelloWorld" => "Fastlane Prov" # Update with your app bundle ID and provisioning profile name
        },
        method: "ad-hoc" # Use the method that matches your provisioning profile (e.g., 'ad-hoc', 'app-store', 'development')
      }
    )
  end

  # Define a lane to build and distribute the iOS app via Firebase App Distribution
  desc "Build and distribute iOS app"
  lane :distribute_ios do
    build_ios_app(
      scheme: "Runner",
      export_options: {
        provisioningProfiles: {
          "com.dxsolo.fastlaneHelloWorld" => "Fastlane Prov" # Ensure provisioning profile is properly set
        },
        method: "ad-hoc", # Matches the method used for your provisioning profile
      }
    )
    firebase_app_distribution(
      app: "", # Add your Firebase app ID here
      groups: "", # Add your Firebase testers group here
      release_notes: "", # Optionally add release notes for testers
    )
  end
end
Here is an example of the AppFile

Automating iOS App Builds
In most cases, Fastlane will work seamlessly with Xcode 9 and above. For manual code signing, ensure you have the necessary certificates and provisioning profiles downloaded on your machine.
Manual signing iOS apps
To build and distribute your Flutter app for iOS, you can define a simple lane in the fastfile:
desc "Build the iOS app"
lane :build do
  build_ios_app(
    scheme: "Runner" # by default Flutter projects scheme is called Runner,
    export_options: {
      provisioningProfiles: {
        "com.dxsolo.fastlaneHelloWorld" => "Fastlane Prov"
      },
      method: "ad-hoc",
    }
  )
end
To build the iOS app, simply run:
fastlane build
After configuring Firebase App Distribution (covered later), you’ll be able to deploy the app with:
fastlane distribute_ios
Signing iOS Apps Automatically with Match
Fastlane’s match tool simplifies iOS code signing. Here’s how to set it up:
- Create an empty private GitHub repository to store provisioning profiles.
Initialize match locally by running:
fastlane match init
2. Choose git as the storage option when prompted and paste your repository’s URL.
3. Use fastlane match adhoc to create the required profiles for ad-hoc distribution.
4. Create a passphrase you can remember , you will need this later for the ENV MATCH_PASSWORD in the CI/CD pipeline.
5. Enter a Apple developer account username (use a company wide one)
6. You will likely get an error that “An app with that bundle ID needs to exist in order to create a provisioning profile for it”. In this case simply run the following command which will be in the console output enabling you to copy/paste
fastlane produce -u -a com.dxsolo.fastlaneHelloWorld --skip_itc
7. Now back over to your project run the command
fastlane match adhoc
8. Modify your Fastfile to use match for managing code signing:
default_platform(:ios)
platform :ios do
  desc "Build the iOS app"
  lane :build do
  	match(type: "adhoc", app_identifier: "com.dxsolo.fastlaneHelloWorld" ,   readonly: is_ci, git_url: [gitURL])
    build_ios_app(
      scheme: "Runner", # by default Flutter projects scheme is called Runner,
    )
  end

  desc "Build and distribute iOS app"
  lane :distribute_ios do
    build
    firebase_app_distribution(
      app: "[[APP_ID]]",
      groups: "dev",
      release_notes: "Hello World from Fastlane",
    )
  end
end
9. The build lane simply calls the build_ios_app action now without the need to specify the export options. To test this out run the command
fastlane build
Step 3: Integrating Firebase App Distribution
Firebase App Distribution allows you to easily share builds with testers. To integrate it with Fastlane, follow these steps:
- Go to the Firebase Console and create a new project.
- Add an iOS app to your project and grab the App ID from the settings.
Install the Firebase CLI:
npm install -g firebase-tools
3. Authenticate by running:
firebase login:ci
4. There are a few ways to do this but for purposes of local deployments you can put this token into an Environment variable called $FIREBASE_TOKEN which the deployment will look for,
5. Set up the firebase_app_distribution plugin by running:
fastlane add_plugin firebase_app_distribution
In your Fastfile, move match to the distribute_ios lane and remove the manually set export options:
default_platform(:ios)
platform :ios do
  desc "Build the iOS app with Match"
  lane :build do
    build_ios_app(
      scheme: "Runner", # by default Flutter projects scheme is called Runner,
    )
  end

  desc "Build and distribute iOS app"
  lane :distribute_ios do
    match(type: "adhoc", app_identifier: "com.dxsolo.fastlaneHelloWorld" , readonly: is_ci, git_url: ENV['MATCH_GIT_URL'])
    build
    firebase_app_distribution(
      app: "[[APP ID]]",
      groups: "dev",
      release_notes: "Hello World from Fastlane",
    )
  end
end
Now, you can deploy your app directly from the terminal with:
fastlane distribute_ios
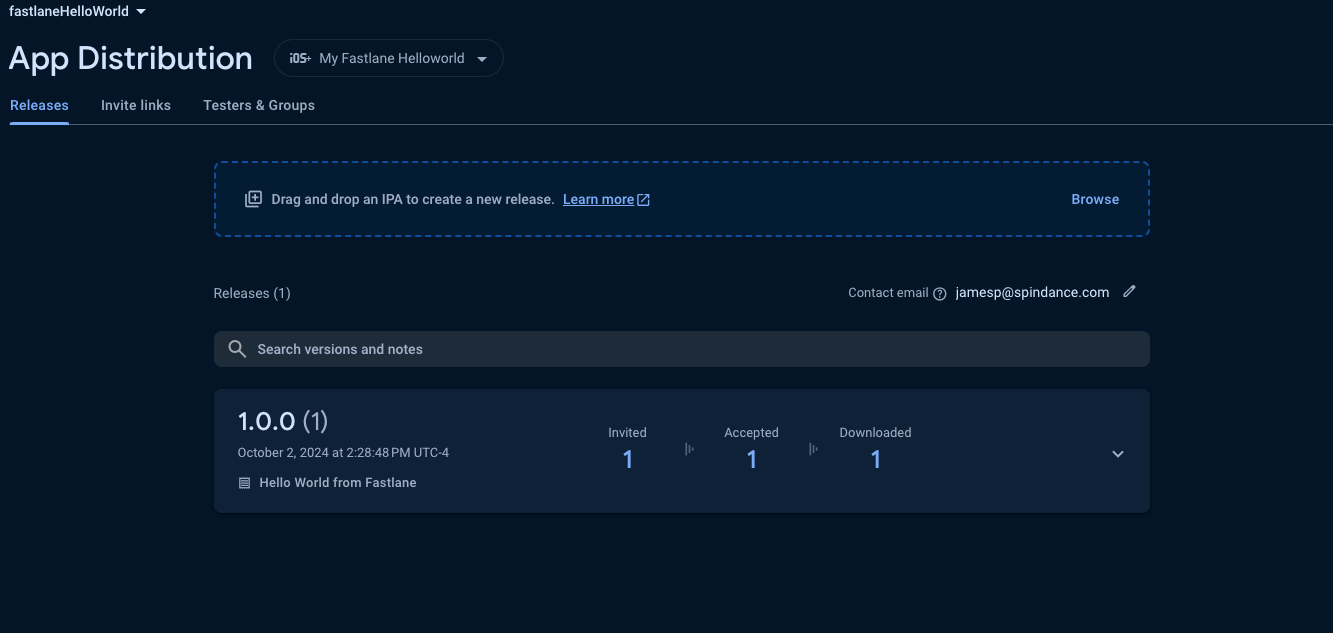
Once this step finishes successfully you should be able to take a look and see the release in the firebase console and have been notified via email.
Auto Increment Build Number
To accomplish this you simply need to update the fastfile once again and use the provided fastlane actions
default_platform(:ios)

platform :ios do
  desc "Build the iOS app with Match"
  lane :build do
    build_ios_app(
      scheme: "Runner", # by default Flutter projects scheme is called Runner,
    )
  end

  desc "Increment the build number"
  lane :increment_version do
    latest_release = firebase_app_distribution_get_latest_release(
      app: "[[APP ID]]"
    )
    increment_build_number({ build_number: latest_release[:buildVersion].to_i + 1 })
  end


  desc "Build and distribute iOS app"
  lane :distribute_ios do
    increment_version
    match(type: "adhoc", app_identifier: "com.dxsolo.fastlaneHelloWorld" , readonly: is_ci, git_url: ENV['MATCH_GIT_URL'])
    build
    firebase_app_distribution(
      app: "[[APP ID]]",
      groups: "dev",
      release_notes: "Hello World from Fastlane",
    )
  end
end
Now that this is in place let’s run the distribute_ios lane once again and now when we look at the console we will see 2 versions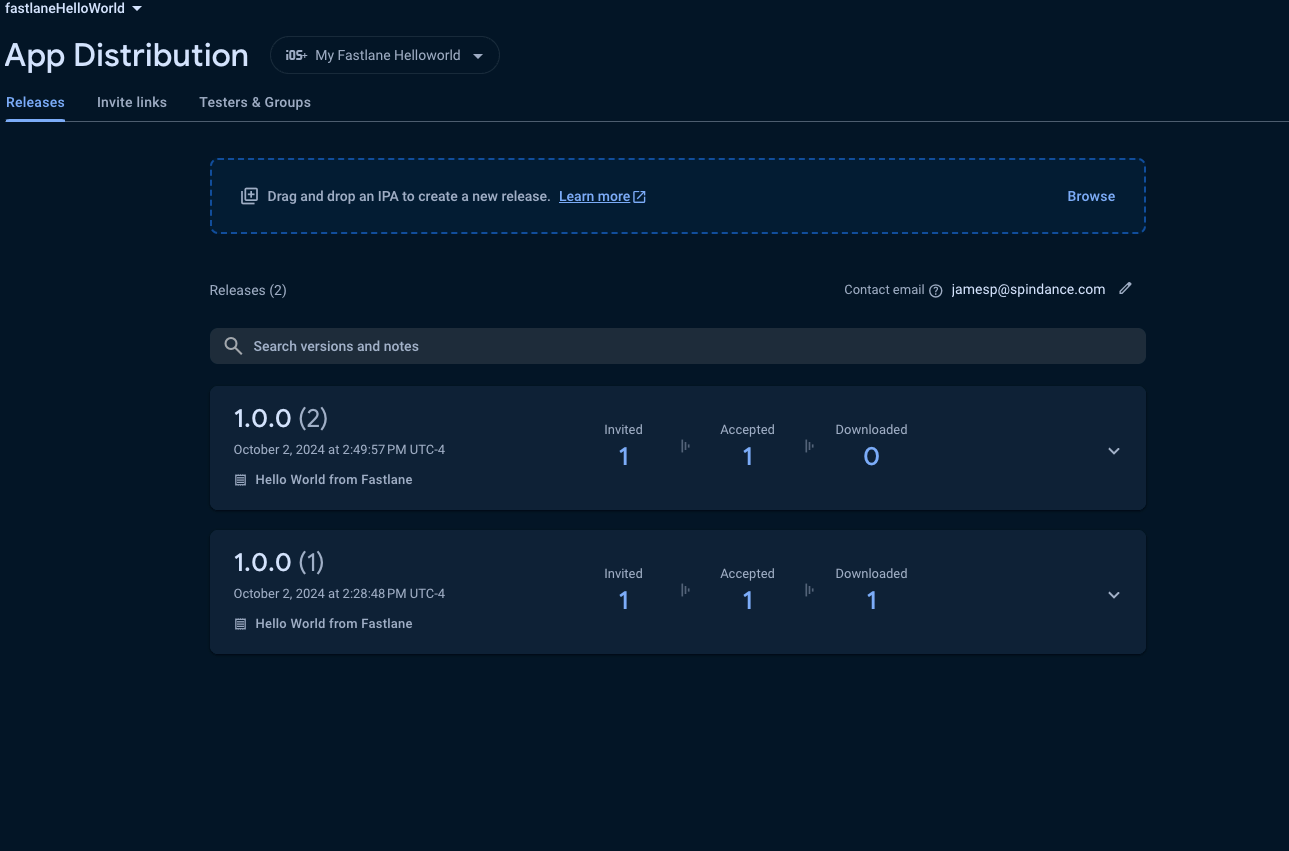
Step 4: Automating with CI/CD
By automating your deployment pipeline, you can trigger Fastlane to build and distribute your Flutter app automatically whenever new code is pushed to your repository. Popular CI/CD platforms like GitHub Actions, CircleCI, or Bitrise can integrate with Fastlane easily.
GitHub Actions Example
Let’s create a basic example of a GitHub Actions workflow that uses Fastlane to build and distribute a Flutter app to Firebase App Distribution:
In order to use the following workflow you need to set up a few things.
- Create a PAT token which will be used to access the match repo
- Create Secrets
- Add setup_ci() to the fast file which will create a temporary keychain on the runner
default_platform(:ios)
setup_ci()
platform :ios do
  desc "Build the iOS app with Match"
  lane :build do
    build_ios_app(
      scheme: "Runner", # by default Flutter projects scheme is called Runner,
    )
  end

  desc "Increment the build number"
  lane :increment_version do
    latest_release = firebase_app_distribution_get_latest_release(
      app: "[[APP ID]]"
    )
    increment_build_number({ build_number: latest_release[:buildVersion].to_i + 1 })
  end


  desc "Build and distribute iOS app"
  lane :distribute_ios do
    increment_version
    match(type: "adhoc", app_identifier: "com.dxsolo.fastlaneHelloWorld" , readonly: is_ci, git_url: ENV['MATCH_GIT_URL'])
    build
    firebase_app_distribution(
      app: "[[APP ID]]",
      groups: "dev",
      release_notes: "Hello World from Fastlane",
    )
  end
end
Create a Personal Access Token
We need to give github actions permission to access the match repo. There are a myriad of ways to do this but for this example we will use a PAT.
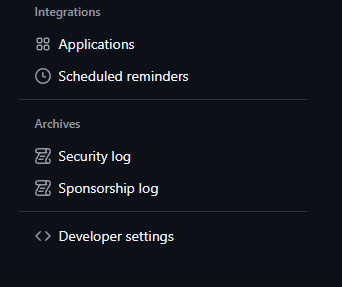
- In Github go to your profile settings and click on <> Developer Settings
- Go to Personal access tokens and choose Tokens(classic)
- Set the note and expiration to whatever you want
- Give this PAT the repo scope
- Copy the token and enter it as a secret in the repo called
REPO_ACCESS_TOKEN
You repository secrets should look like
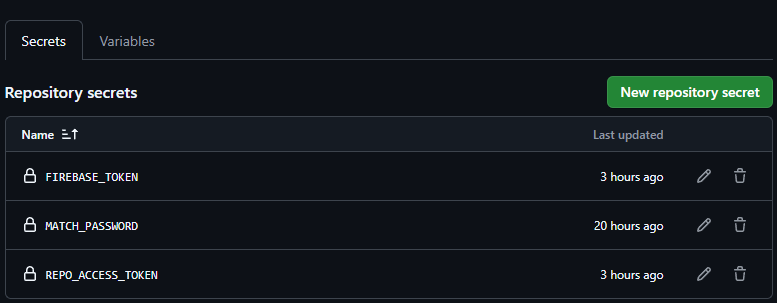
MATCH_PASSWORD- This is the password you used for keychain_password when creating the match repo
FIREBASE_TOKEN- This is the token you create by running the command firebase login:ci on your local machine. Ideally you probably want to move over to a service account based authentication.
REPO_ACCESS_TOKEN- The Personal Access Token you created
iOS Example
name: Build and Distribute iOS
on:
  pull_request:
    branches:
      - master
  workflow_dispatch:

jobs:
  build:
    runs-on: macos-latest
    steps:
      - name: Checkout code
        uses: actions/checkout@v2

      - name: Set up Dart SDK
        uses: dart-lang/setup-dart@v1
        with:
          sdk: '3.4.3'

      - name: Set up Flutter
        uses: subosito/flutter-action@v2
        with:
          flutter-version: '3.22.2'

      - name: Install dependencies
        run: flutter pub get

      - name: Set up Fastlane
        run: |
          cd ios
          bundle install

      - name: Build iOS and distribute with Fastlane
        env:
          MATCH_PASSWORD: ${{ secrets.MATCH_PASSWORD }}
          FIREBASE_TOKEN: ${{ secrets.FIREBASE_TOKEN }}
          MATCH_GIT_URL: "https://${{ secrets.REPO_ACCESS_TOKEN }}@github.com/JamesKPreston/fastlane_match.git"
        run: |
          cd ios
          fastlane distribute_ios
In this workflow:
- It runs on
macos-latestas iOS builds require macOS. - After checking out the code, it installs Flutter and the necessary dependencies.
- Fastlane is set up with
bundle install, which ensures the correct version of Fastlane is installed. - Finally, Fastlane builds and distributes the iOS app using the
distribute_ioslane defined in the iOS Fastfile.
With this workflow, your Flutter app will automatically be built and distributed to testers on Firebase App Distribution whenever changes are pushed to the main branch.
Step 5: Best Practices
Best Practices:
- Secure credentials: Use environment variables or Fastlane’s dotenv integration to manage sensitive data.
- Local testing: Always test your Fastlane lanes locally before integrating them with CI/CD.
- Keep Fastlane updated: Regular updates ensure compatibility with new Flutter, iOS, or Android versions.
- Version control: Track changes to your Fastfile for easier troubleshooting.
Resources
- Flutter Documentation
- Fastlane Documentation
- GitHub Actions Documentation
- Firebase App Distribution with Fastlane
- List of all the available actions
- 📸 How to automatically generate localized App Store screenshots:
- 👩✈️ Learn more about distribution to beta testing services
- 🚀 Learn more about how to automate the App Store release process
- 👩⚕️ Learn more about how to setup code signing with fastlane
Conclusion: Simplifying Flutter App Deployment
By incorporating Fastlane and Firebase App Distribution, you can automate the entire build and deployment process for your Flutter apps, saving valuable development time. With this setup, you’ll be able to focus on what matters most—writing great code and delivering features quickly. Why not streamline your next project with Fastlane and Firebase?