A HIL to Die On
By Garrett Sutton | Software Engineer – Embedded |
HIL, or Hardware in the Loop, is a technique for testing an embedded system during the Continuous Integration process. By adding HIL to your CI/CD pipeline, you can automate tests using the exact same hardware you are running in the field! Here at SpinDance, we run a comprehensive set of unit tests and manual system tests on our embedded repositories. These manual system tests can be migrated to HIL to save valuable developer time and minimize human error. The first test we will be automating is the over-the-air (OTA) update. The image below shows how the manual testing can be removed and replaced with HIL orchestrated by GitHub Actions.
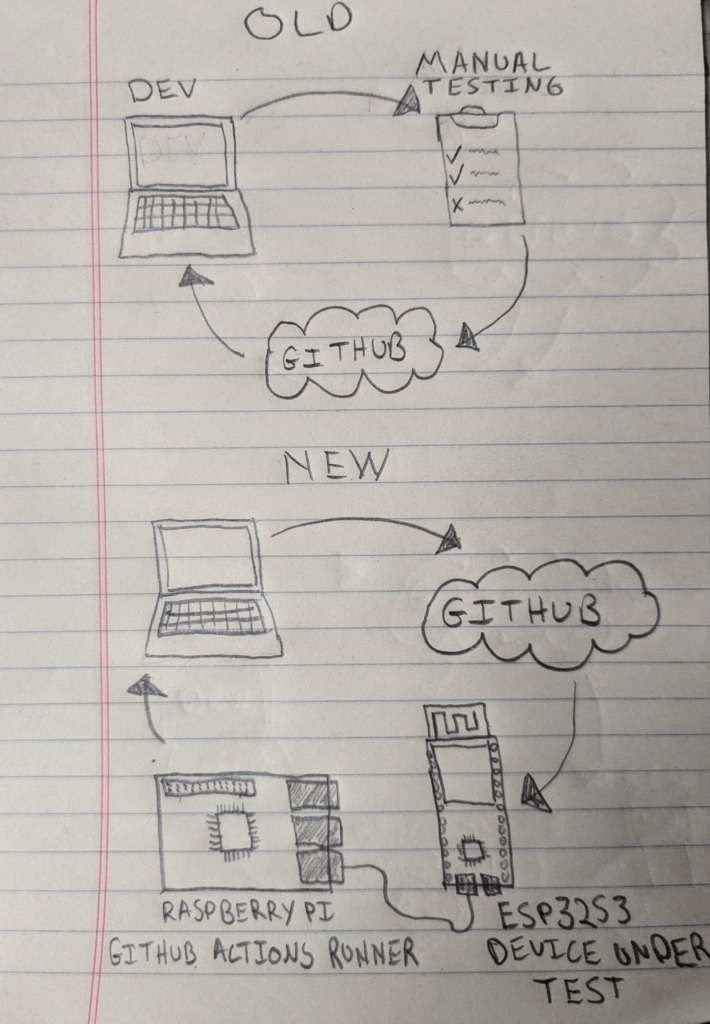
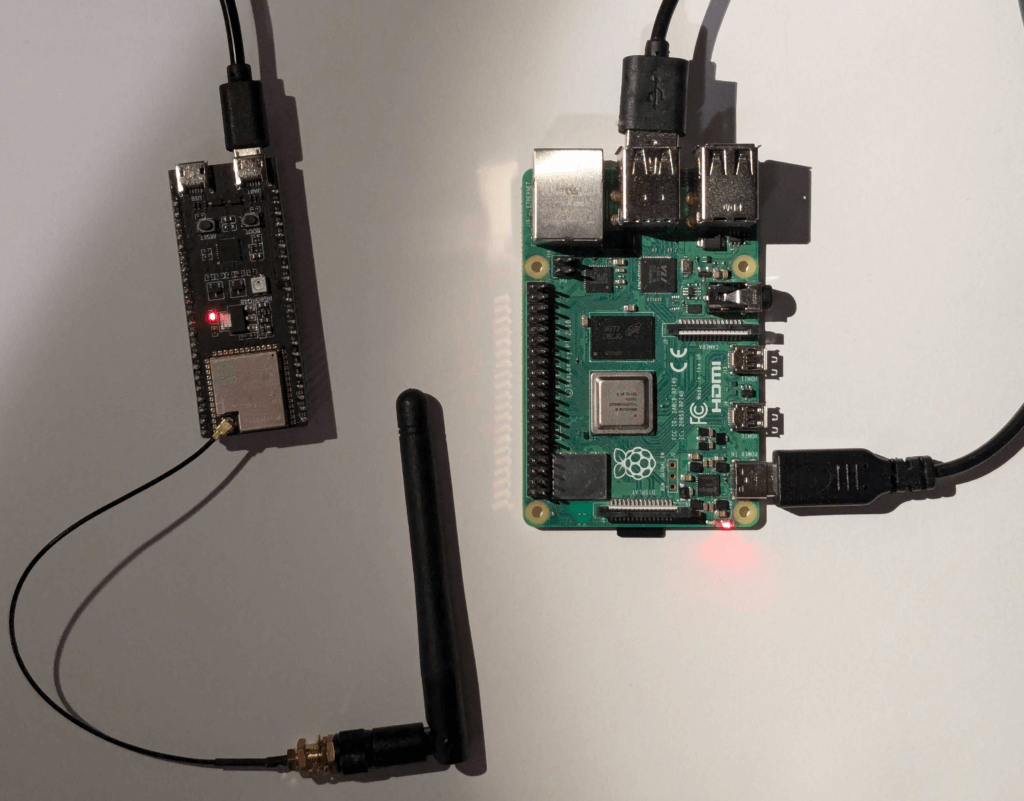
The HIL stack we will be using consists of AWS IoT Core, GitHub Actions, and an ESP32S3 devkit. We will be using GitHub to set up a GitHub Actions Runner on a Raspberry Pi. This allows us to run scripts outside of the GitHub cloud environment to test on our real hardware. AWS IoT Core will be used to perform the OTA. The esp32s3 is our Espressif device under test.
Steps for configuring the HIL
- The first step for setting up HIL is choosing a dedicated machine to be the GitHub Actions Runner. We have chosen a Raspberrypi 4B. Using the Raspberry Pi Imager we have set this up to run Ubuntu but you can find all the supported hardware and OSs in the self hosted runner docs.
- Clone the GitHub Actions Runner repo on your Raspberry Pi.
- Next follow these GitHub instructions to add your pi as a runner at the repo, organization or enterprise level. We have given our runner repository scope as this is the only repo that is relevant at this time.
- Now that our hardware is set up and ready to go we can add a YAML file to our repo to trigger HIL testing. At the root of your repo add the following folder structure and file.
file_path=".GitHub/workflows/ci_on_device.yaml"

mkdir -p "$(dirname "$file_path")"
touch "$file_path"
Below is a simple example of a GitHub workflow. This workflow will run on any PR request to our main branch. This line causes this job to be sent to our local runner instead of one of GitHub’s.
runs-on: self-hosted
The first step clones our repo along with all submodules.
name: On Device Build

on:
  push:
    branches: [ main ]

jobs:
  System_Test:
    runs-on: self-hosted
    timeout-minutes: 60
    steps:
    - name: Checkout repository and submodules
      uses: actions/checkout@v3
      with:
        submodules: 'recursive'
    - name: Build Flash and Test
      run: |
        source .envrc > dev/null
        cd code/projects/devkit
        echo "Building, Flashing and Testing"
        ./build.sh
        ./flash.sh
        ./hil_test.py
5. Next the firmware is built and flashed to the device and the python script is invoked to start the test. Right now our test script boiled down is simply two aws job commands:
This command creates an OTA job that will be sent to our device over MQTT. It returns the id of the job which we will use in the next command to check on the status
job_id = aws iot create-job
This command returns a JSON object with status details about the current job. We parse this object for numberOfSucceededThings for 3 minutes or until it has a value of 1.
aws iot describe-job --job-id <job_id>
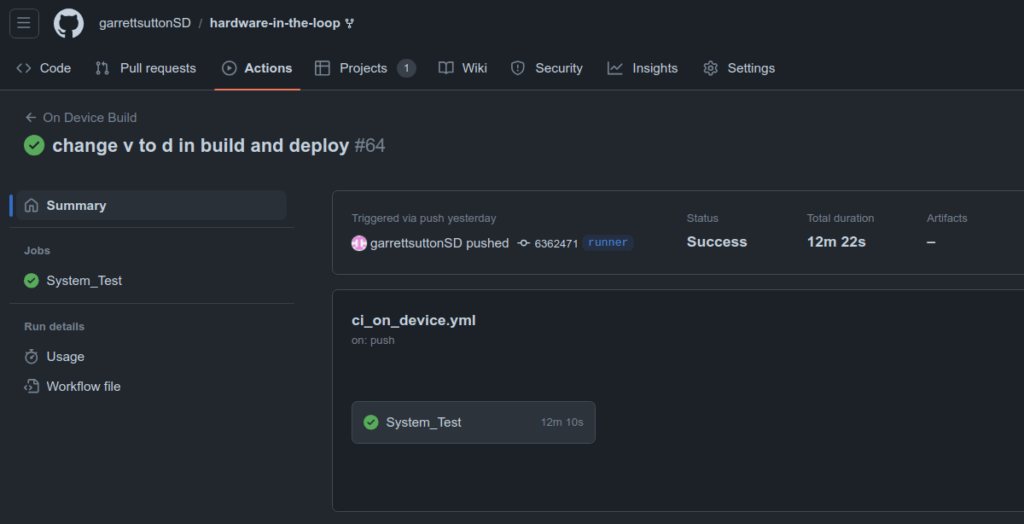
If the job successfully finishes within the timeout, then the Actions Workflow passes. If the job fails, then another push will be needed to reattempt the test.
Previously, this OTA test would have been run by humans who are prone to making mistakes. One common mistake we have seen in a development cycle is not testing the OTA flow on every merge of main. If an OTA bug is introduced and not discovered until many merges later, then a binary search back through the commits begins. While this is faster than manually testing every commit, it is still a tedious task. It is difficult to manually test that often but a GitHub Actions Runner will gladly do it.
Another common mistake is not fully testing the OTA process. If firmware A (old firmware) is on the device and the developer’s test only consists of OTA’ing firmware B (firmware under test), then there is a gap in our test. We should also ensure that firmware B can perform an OTA. If firmware B is OTA’d onto a device but cannot perform an OTA then we are stuck with firmware B forever. While a developer can run this test, a runner will never let you down!
In a future update we will add mobile provisioning combined with GitHub Actions Matrices to automate even more of our manual tests!